DIY: Refinish An Audio Visual Projector Cart

Maybe you've seen a similar cart for sale or already own one?

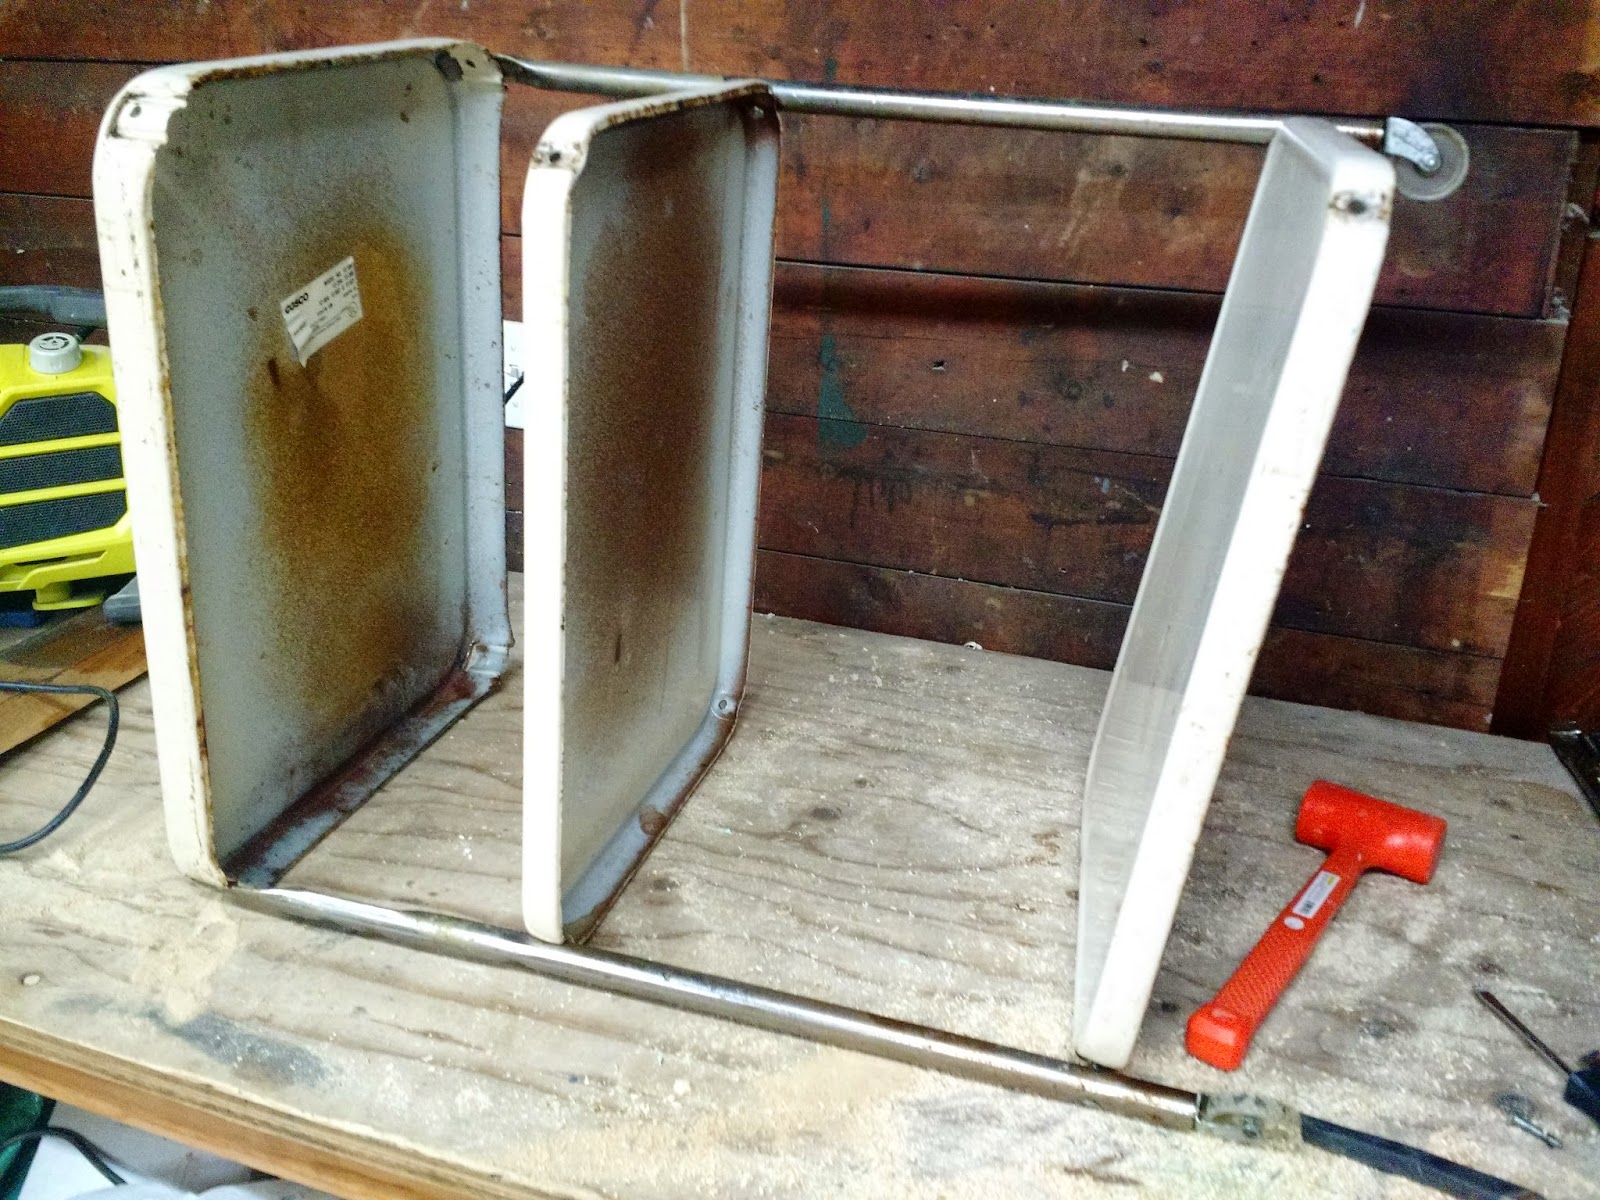
It is an audio visual cart typically found in classrooms, used as a projector stand. See the plug on the top right corner shelf?
I love these carts! I love how utilitarian they are, and the clear resin wheels. I also love that they are fairly easy to come across (for cheap) and have about a zillion practical uses.
Sadly, I can not remember where I found this particular cart (I have the worst memory). "John, where'd I get this cart!?"
Over the past few months, I've seen them everywhere! Most recently, on friends front porches holding houseplants (Hi Andrea & Veronica!) and just this past weekend at a garage sale covered with tools.

My cart was in rough shape though, and can be seen in some of our past kitchen renovation pictures, collecting dust, awaiting its time to shine. And now, that time has come.
I usually hold out for second hand pieces that are in pretty good shape. I rarely purchase items that need to be refinished because, let's be honest, I never get around to doing it.
But I didn't want to change this cart too much ecstatically, and really just wanted to clean it up, so I figured this was a realistic project that I would actually complete.
Even more, this is an easy project! And what I mean is, "Seriously, Gail, you can totally do this yourself!"
See, Gail is my mother's best friend, and she reads the blog often. She recently told me that my DIY: Industrial Curtain Rod post was way over her head. (Disagree....) But for that, Gail, this EASY weekend project is dedicated to you!
DIY: Refinish An Audio Visual Projector Cart
Supplies:
- AV Cart
- Screwdriver
- Bucket
- Mild soap and water
- Spray Paint(s)
- Drop cloth
Step 1:
Assess your cart. Review its condition and work on a plan. For instance, my cart:
- had a slight lean
- was badly rusted on the top shelf and over the legs
- had a lot of gummy/waxy residue on the legs and wheels
- was missing a screw
Step 2:
Fully disassemble the cart. This will be helpful two-fold. It will be much easier to: clean and paint.
Take a look at the screws, and assess which screwdriver (Philips or Flat) you will need and remove all of the screws; starting from the bottom up.
Once you have all of the screws out, you may notice that the top shelf is not secured with screws and rather will easily lift out of the bracket now that all the other levels are off.
Step 3:
Prep the surfaces for painting. Give all the surfaces and parts a quick wash with water and a mild soap.
During this time, I removed all of the wheels, which pop out with minimal shimmying, and soaked them. Fast forward about 30 minutes of soaking, I used an abrasive brush and gave them all a good scrubbing.

On my cart, the top tray and legs were very rusty. I used a fine grit sand paper to smooth out the tray imperfections and steel wool (Brillo) to shine the chrome legs.
** Take your time with these cleaning/prepping steps. And similarly, let all of the wet surfaces completely dry.
Working with clean, dry, smooth surfaces will help the paint adhere evenly and look its best.

Step 4:
Prime the trays. Like I mentioned, my trays were very rusty. And even though most spray paint has primer, I used a spray primer as a base to help smooth out the surface and prep for color. This step may also be necessary if the cart has already been redone before and paint chips disfigure the surface.
Let the primer dry for a minimum of 1.5 hours. Go eat lunch, and come back.
As long as you have thoroughly cleaned and prepped the legs down to the chrome, you should not need to prime the legs.

Step 5:
Paint the legs.

I'll admit, I hesitated here. The chrome legs on my cart shined up really nice, and for a second I though, "maybe I should leave them alone" but I pushed on as I am not a huge fan of chrome.
You may chose to keep them shiny silver, in which case, you're nearly done with this project.
To paint the legs, I vertically draped a drop cloth over some saw horses to the ground, and created a small barrier. If its windy, you risk losing half your paint, so this barrier also creates a nice wind blocker.
I used Rust-oleum Metallic in Pure Gold. Spay the interior side of the legs first, attempting to get the sides as much as possible. Let sit for 30 minutes. Flip and do the exterior side.
 |
| Rust-oleum Metallic in Pure Gold |
** Painting each leg in this order (interior than exterior) which will allow any drips to be freshly covered on the front, most noticeable side.
** Also, don't forget to paint the screw heads.

Step 6:
Paint the tray tops. As I mentioned, I wanted to clean the tray up, more than totally change it esthetically. I chose Antique White spray paint by Rust-oleum, which was pretty close to the original color.

Step 7:
After waiting for a few hours, allowing all the paint to properly set and dry, the final step is simply reassembling.
Start by reinserting the legs in the top tray brackets, then connect the bottom tray to the legs, so the unit can stand freely on its own. This will be slightly awkward, but you'll get the hang.
Loosely connect all screw and bolts, until they are all in place, then tighten them one by one. This will allow for leveling the trays.
Step 8:
Reconnect the plug. In my opinion, Step 8 is an optional, aesthetic addition which I chose to live without. For vintage authenticity, perhaps you would prefer to include it. However it is good to note, most plugs do not meet standard electrical code, and should not actually be used.


Now that this cart has undergone a face lift, I wanted to share with you its versatility, so you can bring one of these "easy to find" second hand pieces back to life yourself.
I put together three simple examples of how this tray could be used in your home. As a bar cart, a coffee nook, or bathroom storage.


Will you be DIYing an audio visual cart this weekend? What do you think
-Courtney
BAR CART

BATHROOM SHELF

COFFEE CART

Will you be DIYing an audio visual cart this weekend? What do you think
-Courtney
Comments