DIY: How to Create Poured Concrete Vanity Tops and Shower Curbs

However, we were looking to scale the cost of the vanity down a bit, and instead of using bluestone as the vanity top again, decided to use poured concrete.
 |
| Bluestone inspiration |
John did the technical research of pouring concrete into molds, and I helped determine the color and texture we wanted to achieve.
The internet is booming with concrete these days, so our inspirations were boundless! Almost too much...
We focused on a simple design, that would easy display a self-rimming drop in sink. For this first concrete pouring attempt, we opted not to add color.
Here's the play-by-play of the sink and shower curb fabrication.
Create a mold:
Using melamine, we created a mold for the curb and counter top. This is a great material because the surface is smooth and concrete doesn't adhere to it. We screwed the sides together with dry wall screws (that would be easy to unscrew later in the process).
We then placed the molds on sawhorses, and checked to ensure they were level. We used scraps of wood to make everything square.
Lubricate mold:
Use a lubricant (we used motor oil) to coat the inside of the mold. this will ensure that the concrete does not set to hard on the surface of the mold and will aid in the mold removal once its set.
As an alternative, we think cooking spray might be even easier to get in the corners of the mold.
Mix concrete:
We used Sakrete 5000. We also purchased Flow Control which is a water reducing additive.
We started by mixing a standard concrete to an "oatmeal" consistency.
We then added the Flow Control, which chemically provided move fluidity to the concrete mixture. Magically, the concrete will have the consistency of liquid without compromising the strength of the mixture.
Fill mold with concrete:
About half way through the mold filling step, stop and add in pieces of rebar to reinforce the concrete structure and add rigidity.
Then, fill the remainder of the mold, fully covering the rebar.
Vibrate mold, vigorously:
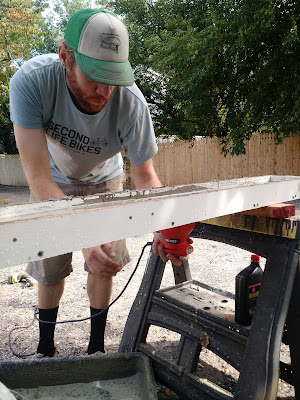
This step helps to bring air bubbles within the concrete mix to the surface. The more time (min 10 minutes) and energy you spend on this step, the less holes you should have on the surface of the finished product.
We used a palm sander (sans sanding pad) to create the vibration on the underside of the mold.
Let concrete set:
We let our molds set for at least 24 hours, but we experienced some cracking initially. We would recommend letting your molds set for a min of 24 to 48 hours. Keep your location in mind, and the weather forecast, so your molds are not in direct rain, sun or snow and can dry as evenly as possible.
Remove molding:
After an adequate drying time, remove the mold screws entirely.
Flip the concrete:
Once the mold is removed, you will need to flip the entire concrete structure, so the inner side is exposed.
 |
| Test fit |
Seal concrete:
We opted to use a Low Lustre Concrete Sealer. At this point, if you would like to color or stain the concrete, there are a ton of paint options available. We did look into this, but in the end, opted for the natural grey concrete color achieved from natural drying.
We put the concrete sealer in a spray bottle, distributed it evenly across the whole surface, and used a foam roller to spread it out.
We applied three coats, with 1-hour of drying time between coats.
Finished results:


Comments